
Best Practices
How to embed changelog in website
Dec 17, 2024
Introduction
As a software developer or product manager, you know the importance of keeping your users informed about the latest changes and improvements to your product. A changelog is an essential tool for communicating these updates, fostering transparency, and building trust with your user base. But do you know how to embed changelog in website and the benefits it brings? If you're new to changelogs, check out our comprehensive guide on what a changelog is.
By integrating your changelog into your site, you make it easier for users to stay up-to-date without having to navigate to a separate page or platform. This convenience can lead to increased user engagement, as visitors are more likely to interact with a changelog that's readily accessible. Moreover, an embedded changelog can boost your site's visibility in search engines, as we'll discuss later in this guide.
In this comprehensive tutorial, we'll walk you through everything you need to know how to embed changelog in website. We'll cover the different formats and hosting options for your changelog file, provide step-by-step instructions for various embedding methods, and share tips on styling and advanced features. By the end, you'll have a professional, user-friendly way on how to embed changelog in website. Let's get started!
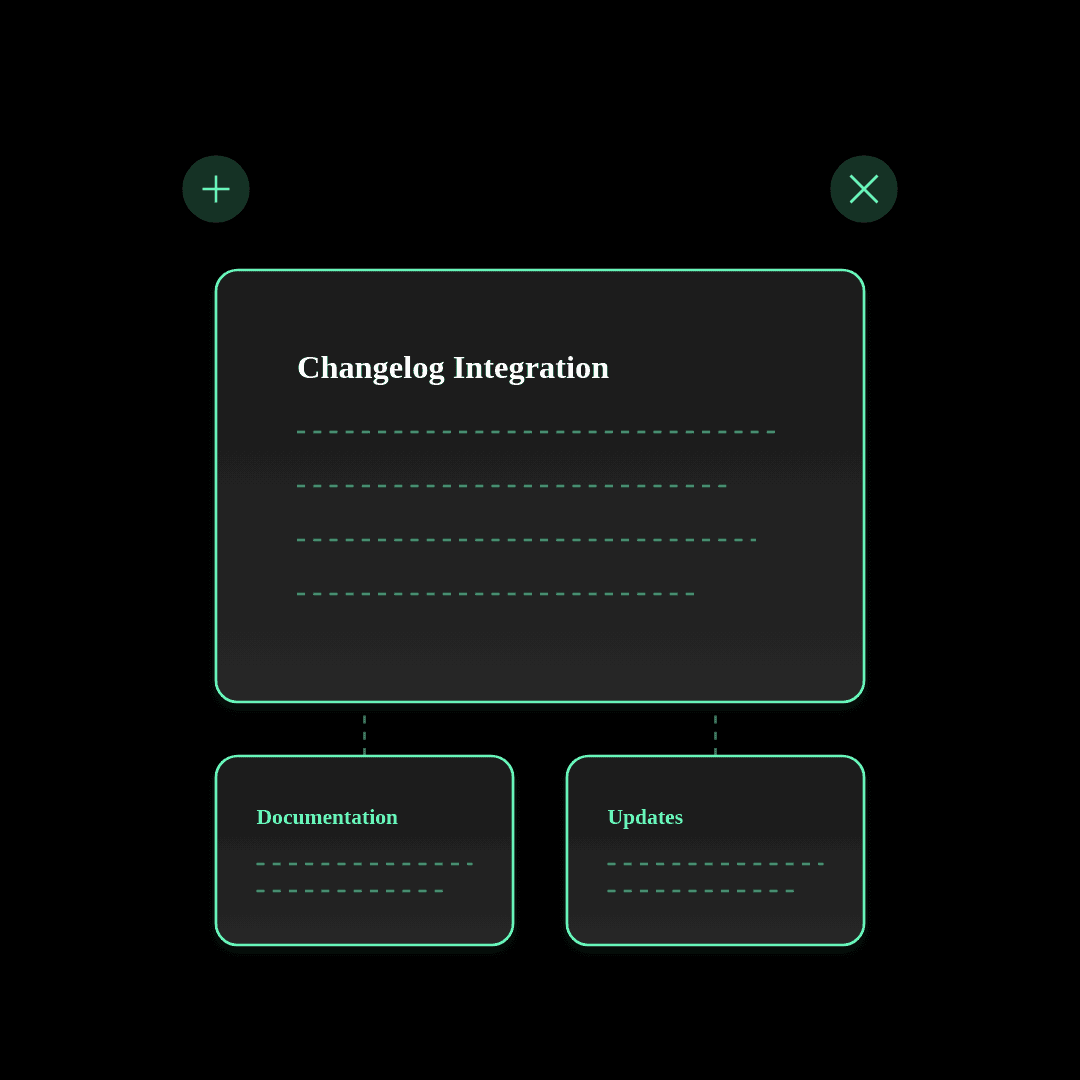
Changelog Formats & Preparation
Before we dive into the embedding process, let's discuss the different formats your changelog can take and how to prepare it for the web.
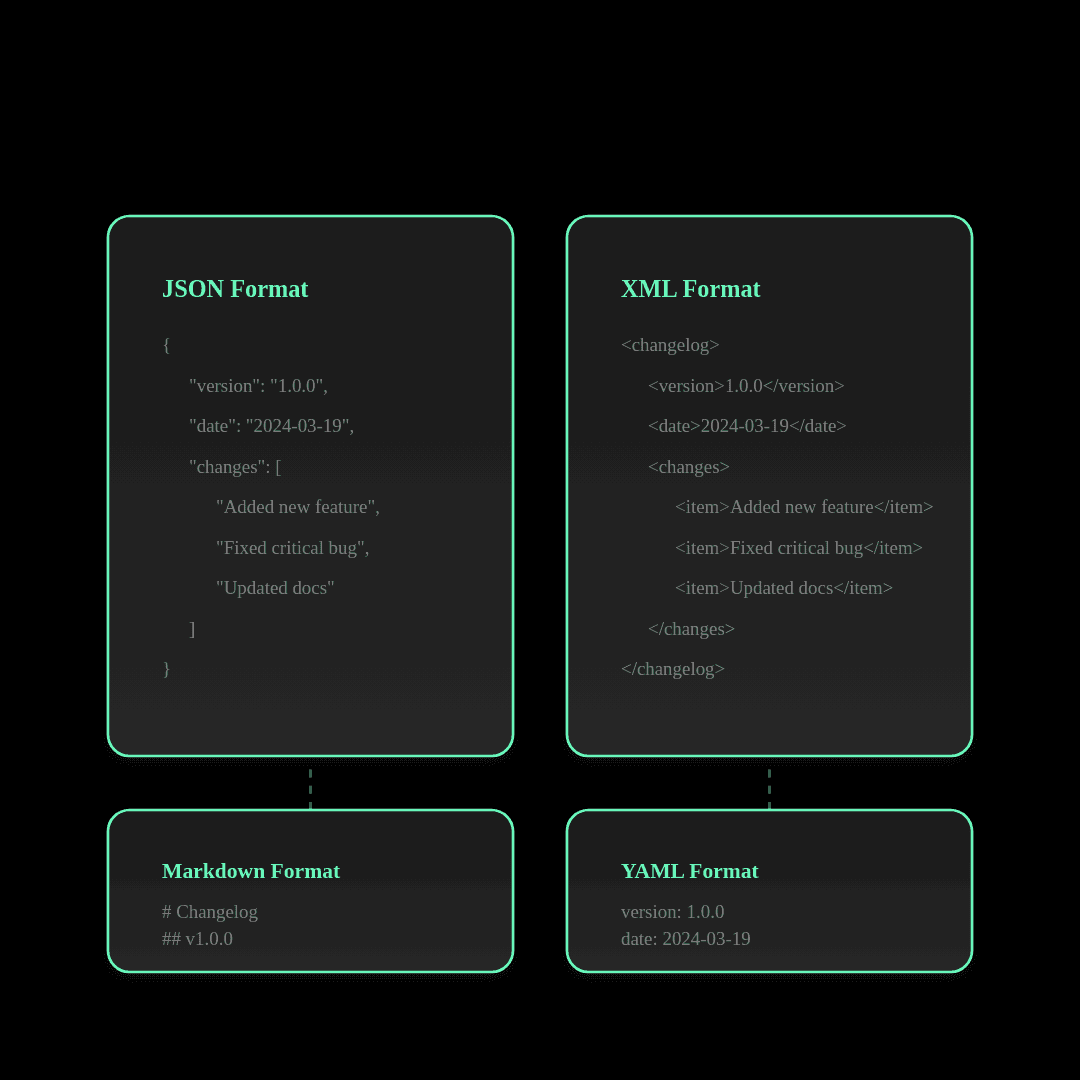
Common Changelog Formats
Changelogs come in various file formats, each with its own structure and advantages. Some popular choices include:
JSON (JavaScript Object Notation): JSON is a lightweight, easily readable format that's well-suited for web applications. It's a common choice for changelogs due to its simplicity and compatibility with JavaScript.
XML (eXtensible Markup Language): XML is a markup language that defines a set of rules for encoding documents in a format that's both human-readable and machine-readable. It's more verbose than JSON but offers more flexibility and is a good choice if you need a more structured changelog.
Markdown: Markdown is a lightweight markup language that's easy to read and write. It's often used for documentation and can be a good choice for changelogs if you want a simple, readable format that can be easily converted to HTML.
Ensuring Your Changelog is Web-Ready
Regardless of the format you choose, it's important to ensure that your changelog file is optimized for the web. This means:
Using a consistent structure and schema for your entries
Ensuring proper encoding (UTF-8 is recommended)
Validating your file to catch any syntax errors
Keeping your changelog concise and focused on user-relevant changes
Hosting Options for Your Changelog File
Once your changelog is prepared, you'll need to host it somewhere accessible to your website. Two common options are:
Using GitHub as a Changelog Host: If you're already using GitHub for version control, you can easily host your changelog file in your repository. This has the advantage of keeping your changelog version-controlled and making it easy to collaborate with your team. To do this, simply create a new file (e.g.,
CHANGELOG.md) in your repository and commit your changes.Self-Hosting on Your Web Server: Alternatively, you can host your changelog file on your own web server. This gives you more control over the file's location and access. Simply upload your changelog file to your server and note the URL for later use in the embedding process.
Embedding Options
Now that your changelog is prepared and hosted, let's explore the different ways you can embed it on your website.
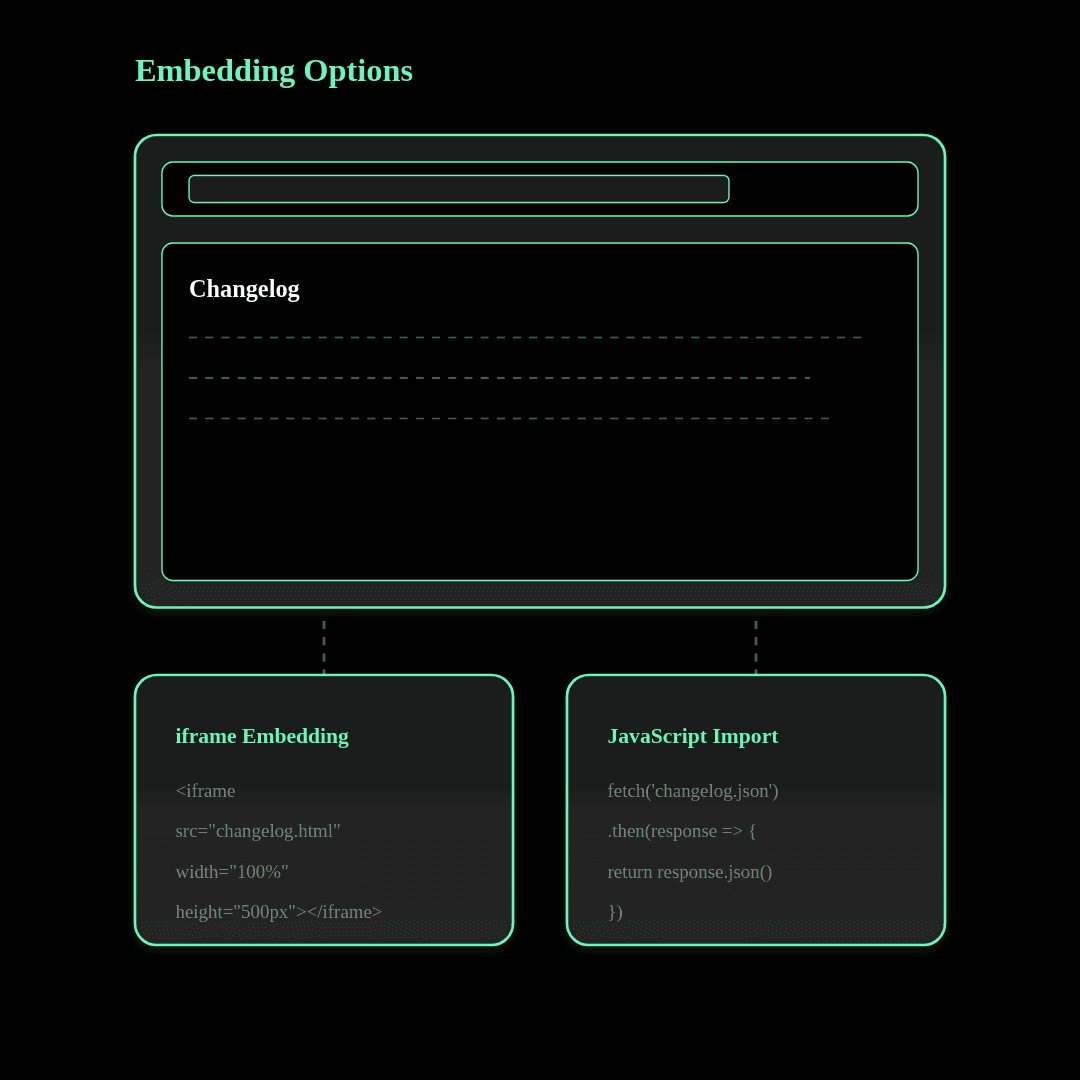
Using an iframe
One of the simplest ways to embed your changelog is by using an HTML <iframe> element. Here's how it works:
Pros and Cons of iframes:
Pros: iframes are easy to implement and don't require any server-side setup. They create a self-contained window for your changelog, isolating it from the rest of your page.
Cons: iframes can be less flexible in terms of styling and interactivity. They can also pose some SEO challenges, as search engines may have difficulty understanding the context of the content within an iframe.
Step-by-Step Implementation Guide:
Upload your changelog file (e.g.,
changelog.html) to your web server.On the page where you want to embed the changelog, add the following HTML code:
<iframe src="path/to/your/changelog.html" width="100%" height="500px" frameborder="0"></iframe>Replace
path/to/your/changelog.htmlwith the actual URL to your hosted changelog file.Adjust the
widthandheightattributes as needed to fit your design.
Iframe Sizing and Responsiveness Tips:
Set the
widthto100%to make the iframe responsive and fit the width of its container.Adjust the
heightbased on the expected length of your changelog. You can use fixed pixel values or percentages.Consider using CSS media queries to adjust the iframe's dimensions on different screen sizes for optimal readability.
Using JavaScript to Fetch and Display the Changelog
For more flexibility and control over your changelog's appearance and behavior, you can use JavaScript to fetch the changelog data and dynamically render it on your page.
Advantages of This Approach:
Allows for more customization of the changelog's style and layout
Enables interactive features like search, filtering, and collapsible sections
Gives you control over how the changelog is loaded and updated
Step-by-Step Implementation with Code Samples:
Create a container element in your HTML where you want the changelog to appear:
<div id="changelog-container"></div>Assuming your changelog is in JSON format, use the
fetchfunction to retrieve the data:fetch('path/to/your/changelog.json') .then(response => response.json()) .then(data => { // Process and display the changelog data const changelogContainer = document.getElementById('changelog-container'); // Loop through the changelog entries and create HTML elements data.forEach(entry => { const entryElement = document.createElement('div'); entryElement.innerHTML = ` <h3>${entry.version}</h3> <p>${entry.date}</p> <ul> ${entry.changes.map(change => `<li>${change}</li>`).join('')} </ul> `; changelogContainer.appendChild(entryElement); }); }) .catch(error => { console.error('Error fetching changelog:', error); });Adjust the code to match your changelog's structure and the desired HTML output.
Handling Errors and Edge Cases:
Use
.catch()to handle any errors that may occur during the fetch request.Consider adding loading states or error messages to inform users if the changelog fails to load.
Implement caching mechanisms to avoid excessive requests to the server.
Styling Your Embedded Changelog
Once your changelog is embedded, you'll want to style it to match your website's design and ensure a pleasant reading experience for your users.
CSS Techniques for Clean, Readable Changelog Design:
Use a clear, legible font for your changelog text.
Provide ample whitespace between entries and sections.
Use headings, bullets, or numbering to organize and hierarchy information.
Consider using alternating background colors for easier visual separation of entries.
Responsive Design Considerations:
Use relative units (e.g.,
%,em,rem) for font sizes and spacing to ensure proper scaling on different devices.Apply CSS media queries to adjust layout and font sizes for optimal readability on various screen sizes.
Test your changelog's appearance on multiple devices and browsers to ensure consistency.
Matching Your Site's Branding and Style:
Use your website's color scheme for the changelog's background, text, and accent colors.
Apply your site's typography styles (font family, sizes, weights) to the changelog for a cohesive look.
Incorporate your logo or other brand elements to reinforce your brand identity.
Example CSS Code and Explanations:
#changelog-container { font-family: Arial, sans-serif; max-width: 800px; margin: 0 auto; padding: 20px; } .changelog-entry { margin-bottom: 30px; padding: 20px; background-color: #f9f9f9; border-radius: 5px; } .changelog-entry h3 { font-size: 1.5em; margin-bottom: 10px; color: #333; } .changelog-entry p { font-size: 0.9em; color: #666; margin-bottom: 10px; } .changelog-entry ul { list-style-type: disc; margin-left: 20px; } .changelog-entry li { margin-bottom: 5px; }This CSS code snippet accomplishes the following:
Sets a consistent font family and max-width for the changelog container.
Adds margin, padding, background color, and border radius to each changelog entry for better separation and readability.
Styles the entry headings with a larger font size and different color.
Adjusts the font size and color of the entry's date.
Styles the list of changes with disc bullets and left margin.
Feel free to adapt and expand upon this code to match your specific design requirements.
Advanced Techniques
To take your embedded changelog to the next level, consider implementing some of these advanced features:
Adding Search & Filtering Capabilities: Allow users to search for specific keywords or filter the changelog by version, date, or category. This can be achieved using JavaScript to dynamically show/hide entries based on user input.
Lazy Loading for Performance: If your changelog is lengthy, consider implementing lazy loading to load entries on-demand as the user scrolls. This can significantly improve your page's initial load time and performance.
Implementing Click-to-Expand for Changelog Details: Use JavaScript to create collapsible sections that reveal more details about each change when clicked. This can help keep your changelog compact while still providing access to in-depth information.
SEO Considerations for Embedded Changelogs: Ensure that your changelog's content is accessible to search engines. Use descriptive, keyword-rich headings and provide concise, relevant summaries for each entry. If using an iframe, consider providing fallback content or links for search engines.
Integrating With Changelog Tools
While you can manually create and maintain your changelog, using a dedicated changelog tool can streamline the process and provide additional benefits.
Benefits of Using a Dedicated Changelog Tool:
Automates the process of generating and updating your changelog
Provides templates and formatting options for consistent styling
Often includes built-in hosting and embedding capabilities
May offer collaboration features for team members to contribute to the changelog
How Changelog Tools Simplify the Embedding Process: Many changelog tools provide embed codes or widgets that you can easily copy and paste into your website's HTML. These tools handle the hosting and formatting of your changelog, reducing the amount of manual setup required.
Embedding Examples with Popular Tools: Here are a few popular changelog tools and how to embed their changelogs on your site:
ChangelogGen automates the changelog creation process by syncing with your GitHub repositories and using AI to generate summaries of your closed issues.
To embed your ChangelogGen changelog:
Connect your GitHub account to ChangelogGen.
Edit and customize your changelog using ChangelogGen's rich text editor.
Customize your changelog's appearance (colors, fonts, etc.) to match your brand.
Copy the provided embed code and paste it into your website's HTML where you want the changelog to appear.
ChangelogGen automatically keeps your changelog up to date as you close issues on GitHub, and the AI-generated summaries help make your changes clear and user-friendly.
Headway is a tool for creating and managing product updates and changelogs.
To embed your Headway changelog:
Create a new changelog in your Headway account.
Add your updates and changes using Headway's editor.
Navigate to the "Embed" tab and copy the provided embed code.
Paste the embed code into your website's HTML where you want the changelog to appear.
Beamer is a changelog and announcement tool that allows you to notify users about updates and new features.
To embed your Beamer changelog:
Create a new changelog in your Beamer account.
Add your updates and changes using Beamer's editor.
Go to the "Installation" tab and copy the provided JavaScript snippet.
Paste the snippet before the closing
</body>tag of your website's HTML.Customize the appearance and behavior of your changelog using Beamer's settings.
These are just a few examples of the many changelog tools available. Regardless of which tool you choose, integrating with a dedicated platform can save you time and effort in managing and embedding your changelog.
Conclusion
Embedding a changelog on your website is a powerful way to keep your users informed, engaged, and excited about your product's evolution. By following the steps and best practices outlined in this guide, you can create a professional, user-friendly changelog that seamlessly integrates with your site and elevates your user experience.
Remember to:
Choose a changelog format that suits your needs and ensure it's web-ready.
Select an appropriate embedding method (iframe, JavaScript, or server-side) based on your requirements and technical capabilities.
Style your changelog to match your site's branding and prioritize readability.
Consider implementing advanced features like search, filtering, and lazy loading for enhanced usability.
Keep your embedded changelog up-to-date with your product's latest changes and improvements.
By dedicating effort to creating and maintaining a comprehensive, user-centric changelog, you demonstrate your commitment to transparency, communication, and customer satisfaction. So go ahead, experiment with the techniques shared in this guide, and take your product's changelog to new heights!
And there you have it—a complete guide to embedding your changelog on your website. By following these guidelines and best practices, you'll be well on your way to creating a changelog that informs, engages, and delights your users.
If you need any further assistance or have additional questions, feel free to reach out. Happy embedding!
FAQ
How to embed a changelog in website?
To embed a changelog on your website, first prepare your changelog file in a web-friendly format like JSON or HTML. Then, use either an iframe or JavaScript to fetch and display the changelog content on your desired page. Finally, style the embedded changelog to match your site's design and branding.
Can I embed a changelog on multiple pages of my website?
Absolutely! You can embed your changelog on as many pages as you'd like. Just make sure to use the appropriate embed code for each instance. Consider adding it to your homepage, product pages, and dedicated update or blog sections.
How can I gather user feedback on my changelog?
Encourage users to leave comments, ratings, or reactions to your changelog entries. You can add commenting functionality using third-party tools like Disqus or build a custom solution. Regularly monitor and respond to user feedback to show that you value their input and to gather insights for further improvements.
Embed Your Changelog